Friday, 19 October 2012

A couple of notebooks...

Hi Susan here...

I always make notebooks for presents, especially for my girls, we are all big note takers and have several notebooks for different things on the go all the time.

Here are just a couple that I have made just lately.....


This is the side view of the notebook, I always try to use similar colours for the paper that I used in the main book cover.
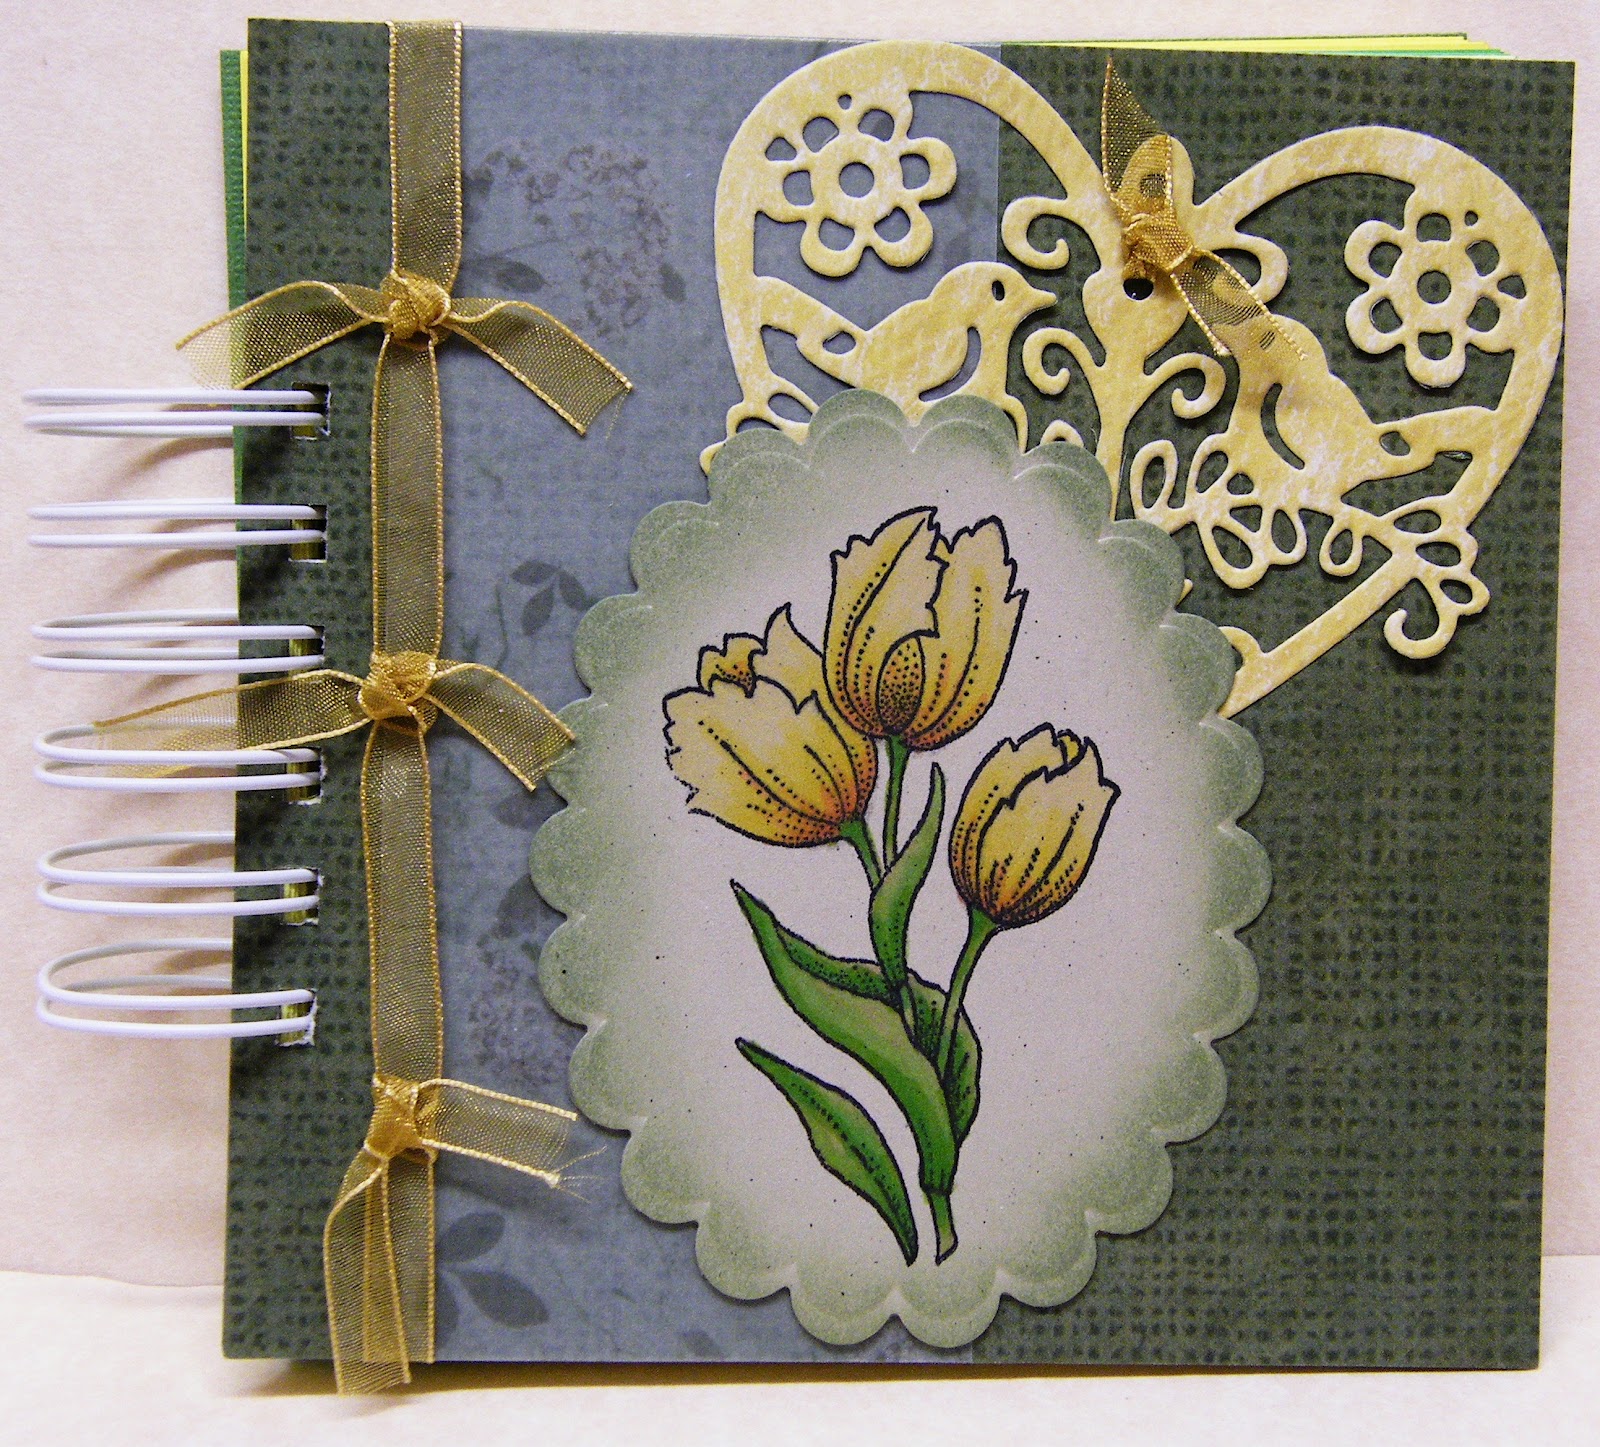

This is a closeup of the front cover. I use a firm card for the covers then use backing paper that I glue in place to cover the card before I start decorating.
I wanted to make my notebooks quite flat this year, they are usually very highly decorated, but sometimes you couldn't carry them in your handbags without a cover in case some of the embellishments got damaged.

My backing paper was from an old 12x12 scrapbooking pad that I have had for ages, I then used a tiny strip of vellum down the side.
The beautiful heart die cut is from Marianne Designs and I love it, it is so special and looks amazing.
The ribbon is from our local market.


This is a close up of the stamp image, it is part of a set from Chocolate Baroque. It is a new buy, and is gorgeous, My favourite spring flowers are tulips and I fell in love with this stamp set the moment I saw it.
I have used chalks to colour the image then used a nestability for the backer and I used Tim Holtz Distress Inks for the edges.


My second notebook uses the other part of the stamp set from Chocolate Baroque.


I used a plain white paper for the inside of this notebook.


I made this book slightly different than normal, I glued the backing paper onto the card and then distressed the edges using a pair of scissors.
I know this one is slightly more delicate in design than the previous one with the butterflies, but hey so this notebook is not carried in a handbag, I will probably make many more that can be.

The backing paper is from my stash, it is a gorgeous warm brown with a pink design. This is what gave me the inspiration for my colour scheme. Papers can do this to you, you can look at a piece of paper and instantly a design comes into your head, I wasn't sure I would make a card or a notebook, but I have a bit more so a card is not out of the question.
The butterflies are a die, I have used distress inks to colour them and then added pearls that we buy from our local market for the bodies.
The ribbon is from our local market. It is a beautiful woven ribbon with a little scalloped edge.


As I told you before this image is the second part of the stamp set from Chocolate Baroque. I used Promarkers to colour this image and then inked the edges with Distress Inks.

I hope you have enjoyed looking and many thanks for your comments.
Love and hugs
Susan xxx


Monday, 15 October 2012

Halloween at Lexi's Creations....

Hi Susan here

 Can you believe that October is nearly at its end....!!
Over at Lexi's Creations we are starting a new challenge today, and the theme is

'Halloween'

Appropriate challenge for this time of the year. I love the reds, yellows, oranges, and black colours that are used on these creations.
Full details can be found on the Lexi's Creations Challenge Blog about this fabulous challenge and our great sponsor. 

Now onto my card....


My backing paper is from a 6x6 scrapbooking pad that I have had for ages, the colours in it always remind me of celebrations and this time of year. I decided on red and black for my main colours as I think they are so dramatic and I always think of these two colours when I think of vampires and bats.

The gorgeous little silver charm is from Ebay.
The sentiment ticket is originally from Fairy Dust Crafts, I blanked out the middle and put my own sentiment there, coloured the outer edge with Promarkers and then glued it to a die cut shape using black card and glittered the edge. The die is from Raindrop Echo.

I have used several dies on this card, including a gorgeous Tilda edging for the black strip at the back of the image. I put some stickles all along the edges.


This cute image has been designed by our own Lexi Lee and is available from Fairy Dust Crafts Store, it is called Vampire Bear.
I have used chalks to colour the image, I have added stickles to the moon to make it shine.
I used another die - a nestabillity die for the topper and then trimmed the shiny red card to back that.
All the card used is from Paper Mill Direct.

I hope you decide to come and join us in this fabulous challenge at Lexi's Creations.

Thank you for taking the time to look at my creation and for your many wonderful comments.
Love and hugs
Susan xxx


Tuesday, 9 October 2012

A Fairy Merry Christmas...

Hi Susan here...

I am making Christmas cards like mad now....I sit in my craftroom and say I'll not make any more...but then I see a stamp and there you go I start on another card....


I have used a base red card from Paper Mill Direct and then put a piece of vellum on the top.
My flowers are from Hobby Craft, I have used stickles on the edges of the petals.
I have used some new die cut wooden leaves with my flowers for a change and a beautiful tree behind my sentiment. They come in a little tray, I am sure you will all have seen these in your craft shops.
The ribbon is East of India, this is beautiful ribbon such fabulous quality, it spoils you for any other.
My sentiment is an old wooden stamp that I have had in my stash for years, it's such a versatile stamp and I use it often. I have used a die for the backer of my sentiment, this was designed by Ann Vento for her ticket sentiments, I coloured the edges with distressing inks and then added stickles.


This gorgeous fairy is from Sugar Nellie, I have used chalks to colour the image very delicately and then added stickles to her wings and wand etc....
I have used a beautiful die cut backer in a pale pink slightly shiny card from Paper Mill Direct, this card is gorgeous, it has a beautiful sheen to it and even embosses absolutely fabulous, I have used Tim Holtz distressing inks to colour around the edges.


I hope you have enjoyed looking and thank you for your comments.
Love and hugs
Susan xxx


Monday, 1 October 2012

Lexi's Creations.....Pink

Hi Susan here....

Time is passing by so quickly can hardly believe it but here we are at the beginning of October and the start of a new challenge at Lexi's Creations.

The new challenge theme is 'Pink', based on the fact that October is Breast Cancer Awareness month. Full details of the challenge and our special sponsor this time can be found on the LC's Challenge Blog. I hope you will call across and join in our challenge, the inspiration from my design team is amazing I do hope you will take the time to take a look at their work.


Now onto my card for this challenge...


The backing paper is from my stash, the flowers and buds are from Hobby Craft, the leaves I made myself. The butterflies are made using a punch and coloured with some Tim Holtz distressing inks and stickles.
The ribbon, rik rak and lace is from our local market.


One of my favourite of Lexi's Lees designs, Christmas Shopping Phoebe, available from Fairy Dust Crafts Store. Coloured using chalks, I then cut out the image really close and slightly shaped it with my bone folder and glued it onto a topper of textured card from Paper Mill Direct.

I hope you liked my creation and thank you for taking the time to look and for your fabulous comments.
Love and hugs
Susan xxx


Friday, 21 September 2012

Santa Claus Post Office...

Hi Susan here...

Busy, busy, busy making Christmas cards, but I love making these and sometimes once I get started I find it hard to stop!!


The backing papers are from my stash....I cut a strip for the base and folded it into a frill then added the ribbon to it.
The ribbon is from East of India, love this really great quality ribbon.
The flowers are from Hobby Craft, the leaves have been made using a punch.


The gorgeous sentiment stamp is from Lili of the Valley set 17 Grunge Christmas Postmarks.
The image is Crafters Companions Mulberry Wood, I have used chalks to colour the image and then added stickles to the snow and glossy accents to the fairy lights.

I hope you have enjoyed looking and many thanks for your comments
Love and hugs
Susan xxx

Monday, 17 September 2012

Lexi's Creations.....Make a gift anything but a card

Hi Susan here....

Today at Lexi's Creations we are at the beginning of a new challenge....this one is slightly different than what we usually do in so far as we don't want you to make a card, we want you to make the gift instead.

The theme is...
Make a Gift - Anything but a card

Bit of a challenge I am sure for some and needs some thought, but there are lots of ways that you can do this, you can alter items like books, candles and jars, you could even make notebooks, gift boxes, gift bags etc.....

Come along to Lexi's Creations and join in the fun with us on this challenge, full details can be found on the blog along with our sponsor and lots of inspiration from my very talented design team.

Now for my creation...


I altered a candle to give to a friend for a present. 
My base card was a gorgeous textured white card from Paper Mill Direct. I used an edging die to cut out the beautiful lacy edge, this is from Sizzix and then added some woven ribbon available from Fairy Dust Crafts Store.


I used two images from the Fairy Dust Crafts Store on this gift. The sentiment 'Special Friend' and the flower image 'Baby Bugs Flower'.
I coloured the image and around the edge of the sentiment using distressing inks from Tim Holtz, the flower was cut out very closely to the image so that I could layer it onto the candle and sentiment.

This was a very simple gift but looks really effective.

Thank you for taking the time to look, and for your wonderful comments.
Love and hugs
Susan xxx


Monday, 10 September 2012

A Christmas Card ....

Hi Susan here..

I have started early this year with my Christmas cards and I am now well on the way to having a full box to choose from to give to family and friends, I will definitely be doing this again, there has been no stress and I have really enjoyed designing my cards.

We recently bought some new stamps and this one was no exception, really got me started with the inspiration flowing....


I have had the backing papers for ages and do not know the name of company all I can say is that it is from a 6x6 scrap pack.
The ribbon is East of India...love this ribbon, I know its more expensive than my usual stuff from our market but the quality is amazing I really love it.
My flowers were a new find from Hobby Crafts, the leaves I made using card and inks.
The gorgeous sentiment is from Whimsy and has been designed by Ann Vento.


This is a close up of that gorgeous new stamp from Crafters Companion from the Mulberry Wood Collection. I used chalks to gently colour the image and then added stickles to the snow and glossy accents to the little fairy lights.


This little 'inchy' tile was made using fimo and then gluing a piece of paper to it I used a scrap of backing paper that was just lying around, you then have to rub the edges with a piece of sandpaper and add ink to the edges. These are really simple to make but look so effective on your cards and scrapbook pages.

Hope you have enjoyed looking and many thanks for your comments
Love and hugs
Susan xxx

Monday, 3 September 2012

Autumn Colours at Lexi's Creations

Hi Susan here...

I hope you are all well and looking forward to the Autumn season...those beautiful colours of autumn when the countryside takes on a whole new look and even the trees get a chance to make it look like we are having a second spring.
I love the rich vibrant colours of autumn they are so warming and comforting to look at. Over at Lexi's Creations today we are starting our new challenge and the theme is

'Autumn Colours'

We want to see all those fabulous rich colours on your creations, really show us what Autumn means to you!
For full details of the challenge and our fabulous sponsor please call across to Lexi's Creations and take a look at what my design team has produced for this challenge.

Now onto my cards.....yes I have made two for this challenge, hope you like them.

My first card is using a digi image available from Fairy Dust Crafts.

Backing paper from a 12x12 book. Beautiful shiny mottled paper with autumn leaves in the design.
The flower is from Prima, the leaves I made myself using a stamp that I embossed with clear embossing powder then carefully cutting out coloured with inks and then shaped.
The tiny silver charm is from Ebay.
The beautiful woven ribbon is from East of India.


I have used the digi image Lady Bug Mushroom, designed by Lexi Lee and available from Fairy Dust Crafts Store. Coloured using chalks and edged using distressing inks.


My second card is using a digi image available from our new sponsor My Hearts Pieces

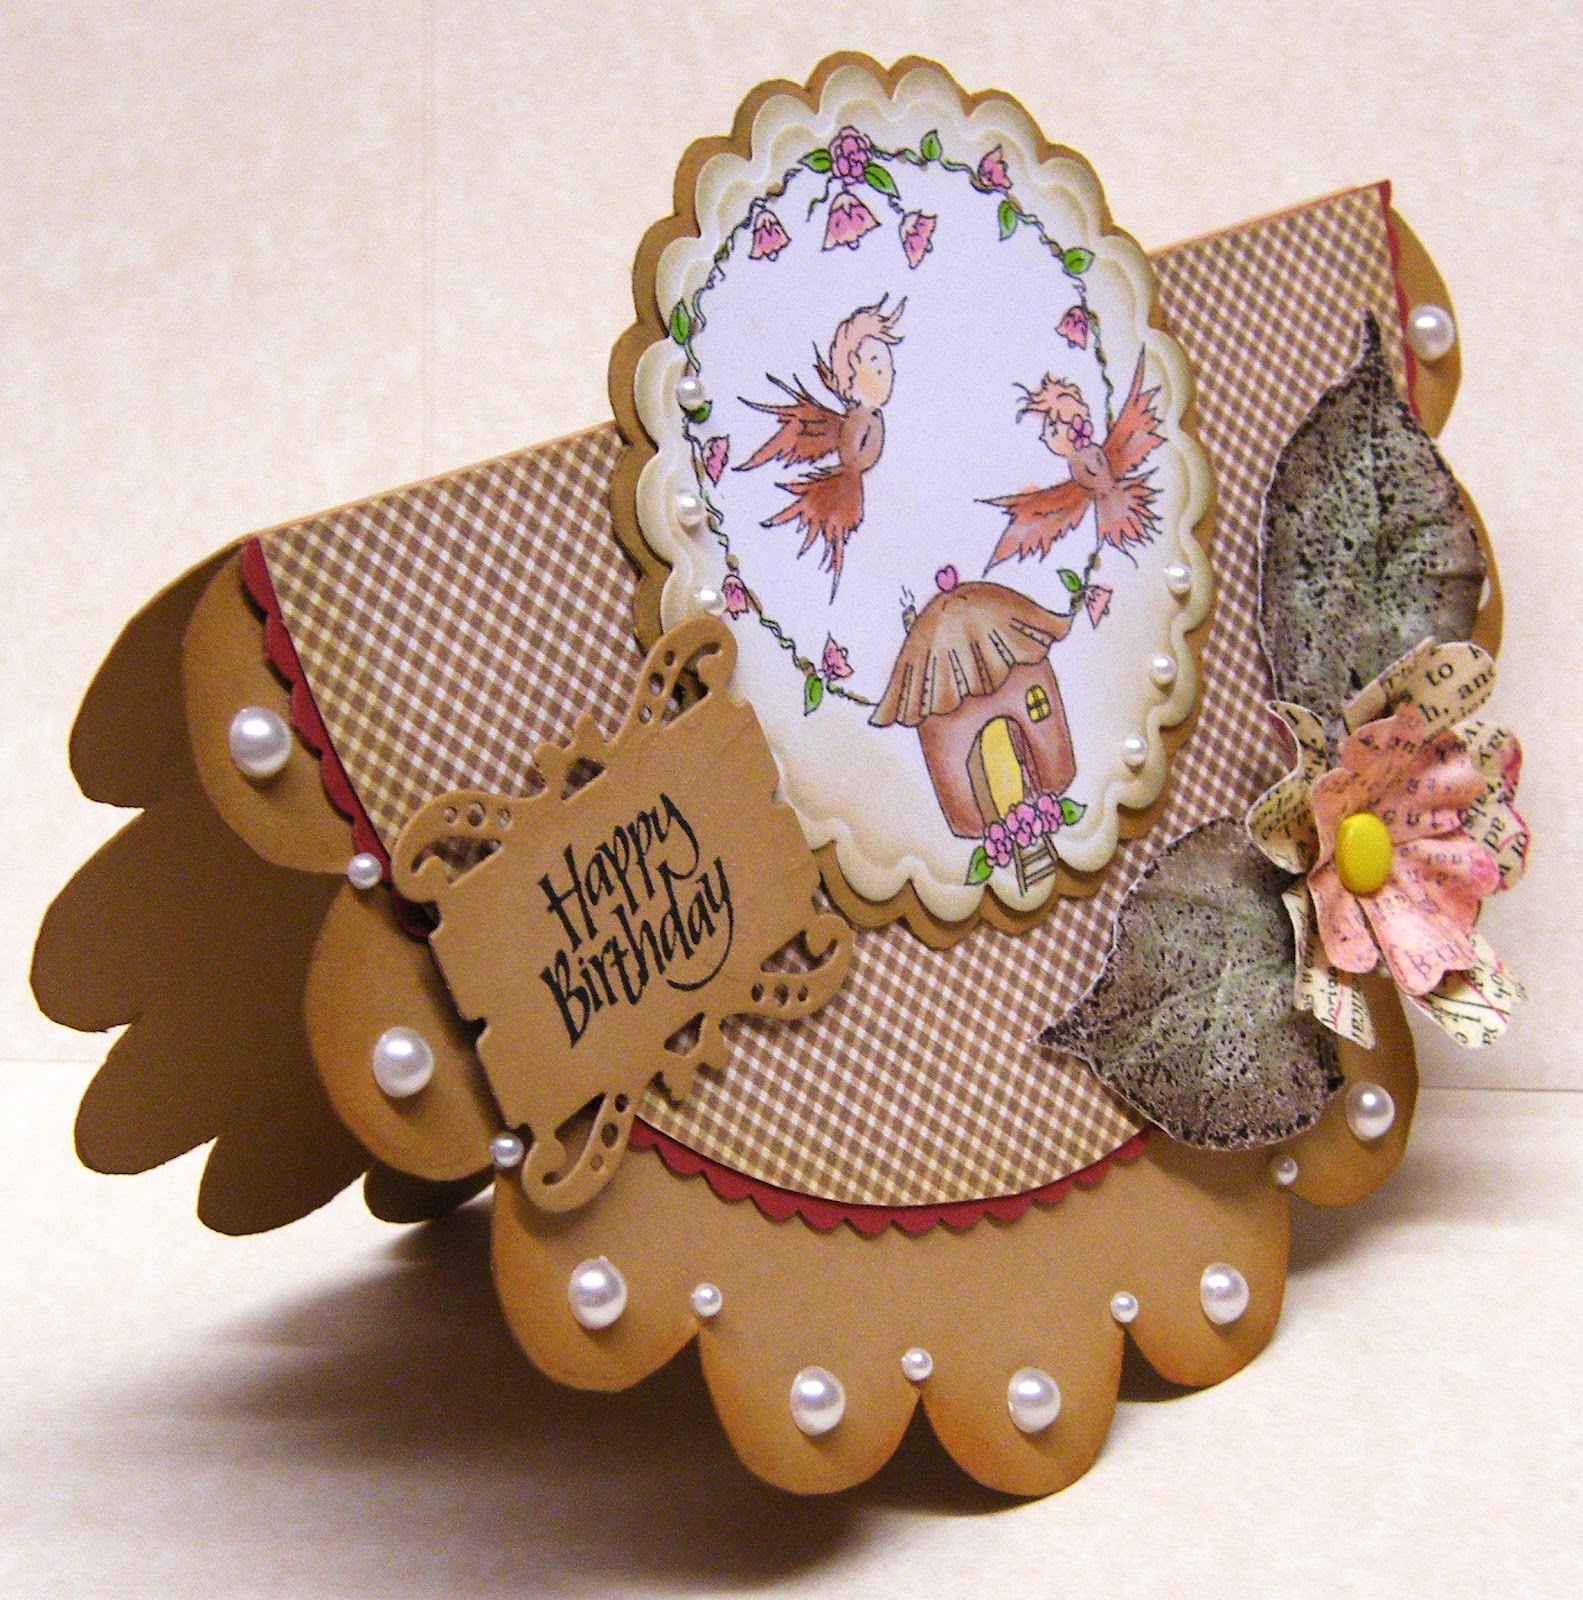
I have used some basic Kraft card cut to shape in scallops, edged with distressing inks, the checked paper is from Nitwits.


This is to show you the side view. The pearls are from our local market.
The flower is from Prima, the leaves have been made using a stamp that I embossed with clear embossing powder then cut out and coloured with distressing inks.
The sentiment is using a stamp I have had for ages and a die from Whimsey.


This is a beautiful digi image from our new sponsor My Heart Pieces and is called Bird House. Coloured using Promarkers and edged with distressing inks.

Thank you so much for taking the time to look at my creations and thank you for your wonderful comments.
Love and hugs
Susan xxx


Monday, 20 August 2012

Lexi's Creations.....Back to school or college

Hi Susan here....

Time is passing by so quickly school and college is about to start again. Exciting times for our children. To start them off on the right track how about sending them a card to wish them well in their first few weeks, or even for their teachers to say hello to the start of the new year.

Over at Lexi's Creations Challenge Blog we are starting a new challenge today relevant to this time of year.

For full details of the challenge and fabulous sponsor, please call across to Lexi's Creations and join in the fun with us, there's lots of inspiration from my design team to help you with this challenge.

So the theme is 'Back to School or College'.

Now onto my card...


I chose some beautiful textured card from Paper Mill Direct, I tried out an idea using some chipboard letters and embossed the card by putting them through my big shot machine, I then rubbed them down gently with sandpaper and used distressing ink to highlight them and the edge of the card..
The ticket has been designed by Lexi Lee and is available from Fairy Dust Crafts Store, I altered it by blanking out the centre of the ticket and putting in my own computer generated sentiment, I used distressing inks around the outer edge. 
The side strip is the negative of some letters that I die cut using a sizzix die, I edge distressed the strip with inks and put a dark brown strip of card at the back to show through.


This very cute digi image has been designed by Lexi Lee and available from Fairy Dust Crafts Store, it is called Baby Giraffe. I coloured the image with chalks, the topper has been edged with distressing inks.


Thank you for taking the time to look around and for leaving me your wonderful comments

Love and hugs
Susan xxx


Monday, 6 August 2012

Lexi's Creations.....Sparkle and shine

Hi Susan here....

Twelve months ago I was asked was I interested in taking over the ownership of Lexi's Creations. I had loved being on the design team since the beginning and would have been devastated to see the blog close so naturally I said yes. It is sometimes hard work but I love it and get really excited when I see the entries for the challenges.
Today at Lexi's Creations Challenge Blog we are starting our new challenge to celebrate this with a theme that reflects how important this is to me....

'Sparkle and Shine'

For full details of this challenge and our fabulous sponsor please call across to LC's Challenge Blog and join in with us. We have some amazing inspiration from my design team they have truly outdone themselves, I feel very lucky to have such a talented group of ladies who never let me down and really make some outstanding creations for each challenge.

Now onto my card...


I have used some gorgeous paper lace behind my ribbon, I have had this for ages and slightly distressed it with inks. The ribbon is from our local market. The little butterflies, that I love putting on my cards are made using a punch, inks, glitter and pearls.
The backing paper is from my stash, this is so gorgeous with flowers and leaves and butterflies all over the paper, the colour is a beautiful brown with hints of pink and green, with silvery text here and there and a sheen all over the finish.
I recently bought a new flower swirl die and have used this behind my flowers.
Gems and glitter has been used throughout my card.


I love making flowers and often get inspiration from the flowers that grow in my garden, this one has been made after looking at the rambling rose I have at the bottom of my garden. 
I made this using white card that I slightly coloured with  two shades of pink distressing ink. I have added a gem in centre and glitter on the petal edges.
The smaller roses and buds are from Hobby Craft. 
The leaves again have been hand made from white card and coloured using inks.


This beautiful sentiment designed by Lexi Lee and available from Fairy Dust Crafts Store, it is called 'Special Friend'.
I have used a die for the topper and distressed the edges with inks and glitter.


Thank you so much for taking the time to look at my creation and for your wonderful comments.
Love and hugs
Susan xxx


Thursday, 2 August 2012

My fun-time card....

Hi Susan here....


Where does your spare time come from, well we all know that we have to make it ourselves and use it to the best of our abilities. To make it work for us, and to get the most out of it.

I know a lot of us in blogland are involved in lots of design teams, I was myself at one time and loved it, but, somewhere along the way I lost something that made making my craftwork special to me. Now I am an independent crafter, I run and own Lexi's Creations as you all know and love every minute, but my spare time now is special and means that I can delve into many of the crafts that I have had to leave on one side because I was committed elsewhere.

Which leads me to show you what I have done this week.....I was totally inspired by an 'arty' article in a magazine I was looking through and decided that I would give the techniques involved a go...I am pleased with my final result. This wasn't of course my first effort, many tries went into the bin before I came up with this one. I hope you like it. It's totally different for me, very simple and clean (in a way).


It has been made using basic white card available from Paper Mill Direct.

I have used a beautiful stamp which is part of a set from Chocolate Baroque using Staz-on ink.

The background I made myself using Promarkers and Tim Holtz distressing inks, blending the two together using some sandpaper and then distressing it all over again. It's a shame but the photograph doesn't show the finished result in the texture of the background, but it is so different to look at than it was at the beginning.

The washy tape I made myself using a stamp from Tim Holtz and some microporous surgical tape.

The crystals are from our local maket.

I tried to be a little arty with this card, never tried anything like this before I hope you like it, I really enjoyed making it and trying out the new techniques during the making up process.

Thank you for looking, please let me know what you think, your comments are always welcome.
Love and hugs
Susan xxx

Monday, 23 July 2012

Lexi's Creations....Christmas in July

Hi Susan here....


Today over at Lexi's Creations we are starting a new challenge....the theme for this new challenge is
'Christmas in July'
A really nice easy challenge for this time of the year when we are all thinking of making cards for family, friends and to sell.....you can make anything for this challenge not just cards, but ATC's, bookmarks, tags, 3D item, scrapbook pages, altered items, you decide it's quite an open challenge as long as the Christmas theme is carried on your project. You can find full details on the challenge blog, plus some fabulous inspiration from my design team.

Here is my card....


I love making Christmas cards, great fun!
My backing papers for this were from Nitwits, all the edges have been distressed with inks and glittered with stickles.
The large gingerbreadman is a bigz die from Sizzix. Don't you just love gingerbreadmen, they are such jolly little fellas!
The gorgeous ribbon is from our local market.
The calendar is one of my own designs


This is such a cute digi image, designed by our own Lexi Lee called 'Gingerbread House' and available from Fairy Dust Crafts
I have used promarkers for the colouring and distress inks for the edging. Stickles here there and everywhere to make it glitter.

Thank you for taking the time to look and for your wonderful comments
Love and hugs
Susan xxx


Saturday, 14 July 2012

Love at Christmas Time

Hi Susan here....


I had some spare time on my hands this last week and decided to make a Christmas card that was different than anything I usually make.

Hope you like it!.....


I had some gorgeous brown silk finish card from Paper Mill Direct, this is a lovely weight of card and has a gorgeous sheen that makes it feel and look very special.

I used a new stamp set from Chocolate Baroque these beautiful trees are so different and I found my mind working in overtime with ideas of how to use them. I stamped them using Tim Holtz Distress Inks, I used the ink in different colours for the shading and then I added glitter to the tops.

I used an edge die from .....for the pale green card and added distress inks and glitter to make it extra special.

The sentiment is one of my own, and cut out using a Nestabilitie Die, then distressed with inks.

The brown satin ribbon is from our local market.

I used a stamp for the leaves, I stamped the design onto a brown card then used distress inks after I had embossed the veins, the little red berries are from Hobby Craft.

The paper lace down the side I have had in my stash for ages, I only use it every so often because I love it and I only have a small amount.

Hope you like the effect as much as I do!

Thank you for taking the time to look and for all your lovely comments
Love and hugs
Susan xxx


Monday, 9 July 2012

Lexi's Creations....For a friend


Hi Susan here...

We are having a lovely challenge starting today at Lexi's Creations...the theme is

'For a Friend'

I love making cards for my friends and seeing their faces when they open up the card box.
You can see full details of the challenge and our wonderful sponsor at Lexi's Creations Challenge Blog.
If you're in need of some inspiration for this challenge then look no further than the display of talent from my design team...amazing work as always.

Now onto my card....


You always need Birthday cards I think, and I love to make them special for my family and friends, I got this design in my head just as I was falling asleep a few nights ago and I just had to make it to see how it looked!
The background papers are from my stash, these were loose 12x12 papers I bought one year on holiday in USA. I only have a few small pieces left now but I love them, the designs were really nice.
I have aged all the edges using Tim Holtz distress inks.
The beautiful woven ribbon is from East of India collection, love this range, I can never resist buying something from it everytime we go to John Lewis's Craft Department.
The sentiment is a rubber stamp.


This is such a gorgeous little digi image, designed by Lexi Lee and available from Fairy Dust Crafts Store, it is called 'Ladybug Flower'.
I have used promarkers to colour and shade the image, then I decoupaged the flower head cutting out different layers of petals and glued micro beads to the centre of the flower head. Up close and personal it is quite effective. I have aged the plaque with distress inks.


This is one of the gorgeous fimo birds that I made a while ago using Emma's cake decorating moulds, I love them. I have slightly inked it using distress inks to take away the starkness of the white fimo, I'm going to try making some more using different colours of fimo.


Thank you so much for taking the time to look and for your wonderful comments
Love and hugs
Susan xxx

Sunday, 1 July 2012

A fun commission.....

Hi Susan here.....

Just recently I was asked to make a notebook by my boss at work....she was giving it to a friend for her birthday, it was to be a kind of diary that her friend would keep and write what happened to her each day going one way in the book, then at Christmas she would give it back to my boss, who would turn the book over and put six months of her own diary keeping into it. My boss is then going to give it back to her friend for her to have as a keepsake about what happened to each of them over the last 12 months. They will be able to put all sorts of memorabilia into the book including photos over the time each of them has the book. It all sounded very intriguing, and fun, and knowing how funny my boss is there will be some funny reading at the end.....

Anyway here it is....


This view is just to show you how thick the book ended up. There is a lot of writing to be done in this!!


I decided that as her friends birthday is in the summer her front cover should represent summer so I made it using bright cheery colours with butterflies and flowers and birthday bunting.

The initial of her friends name was made the main thing on the cover, overstamped with text, and adding lots of glitter. I tried to keep the book as flat as I could.
The butterflies are made using a punch with pearls and glitter added. The flowers are Prima. The background papers are from my stash.


This is to show you how the two 'fronts' were finished.....so that the front for each person was the right side up I had to put one upsidedown when making the book up.


This is the front for my boss, as she was being given the book back at Christmas I decided that her front had to represent Christmas and winter.

Both were very pleased with the book....I can't wait to see what's been written at the end of the 12 months.


Thank you all for looking and for your wonderful comments
Love and hugs
Susan xxx

Monday, 25 June 2012

Lexi's Creations....At the beach

Hi Susan here...

Today a new challenge has started at Lexi's Creations and the theme this time is...

'At the Beach'

You can interpret this challenge as a summer birthday card, a scrapbook page for a visit to the seaside or a fun going on holiday wish you were here card......the choice is yours as long as it is a beach themed creation that will be fine.
For full details of the challenge and our sponsor this time please visit Lexi's Creations and check out the inspiration from my very talented design team.

Now onto my card....


This was such a fun card to make...I don't make many summer cards but I was pleased with the finished result of this one!
The background papers are from a CD Rom from Joanna Sheen called 'Messy Rabbit', it's brimming with the most fabulous papers and toppers. I added glossy accents to the drink in the glass. Then I glittered the sun so that it shone down nice and sparkly!
The sentiment is from a Daisy Hill vellum swatch book called 'Travel', it's full of summer time themed sentiments.


This fabulous image has been designed by Lexi Lee, called 'Fun Time Ollie' and is available from Fairy Dust Crafts Store.
I used chalks to colour and shade the image, then used a nestabilities die to make the topper. I have glued it to the backing papers over the top of the image that was from the CD Rom. I used distress inks to colour the edge of the topper. I also added some glitter to the splashes of water, the palm leaves on the trees and the ocean. I also added glossy accents to the glasses.


Thank you for looking at my design and for all your wonderful comments
Love and hugs
Susan xxx

Monday, 11 June 2012

Lexi's Creations....Happy Birthday


Hi Susan here...

Can you believe how fast this year is moving along.....we are now starting the second week in June yikes!!
Over at Lexi's Creations this is the start of a new challenge today and we have chosen a nice easy one this time, the theme is 

'Happy Birthday'

Yes it's as simple as that....it can be for male or female, child or adult as long as its a birthday themed creation that will be fine.
For full details of our challenge and our fabulous sponsor please call across to Lexi's Creations and take a look at the fabulous inspiration from my design team.

Now for my card....


My favourite kind of card is a birthday card...it is something special for whoever you give it to and can be part of the present as well!

My background papers are from my stash it is originally from a 12x12 Japanese pad, can't remember who's make, I only have a few pieces left and I love it to bits, they are such delicate patterns and colours.

The sentiment is from Fairy Dust Crafts designed by our very own Lexi Lee and appropriately called 'Happy Birthday'.
The die I used for the sentiment is from Tickled Pink Stamps designed by Ann Vento.
The ribbon is is from Ribbon Box, beautiful woven ribbon, I loved using it.
The flowers and leaves are a mixture....The small roses and buds are from Hobby Craft. 
The leaves and the blue pansies I made myself. I used a punch for the shape then coloured the flowers with distress inks and a fine liner, the pearls in the centre are from our local market. I love making my own flowers and often get my inspiration from the flowers growing in my garden. These little blue pansies were originally planted in one part of my garden and have now over the years infiltrated almost every part of the garden, all different sizes and different shades, I love these little flowers.
The beautiful laser cut butterfly is from a collection called Craft for Occasions.

Thank you so much for looking at my work and for your wonderful comments
Love and hugs
Susan xxx


Friday, 1 June 2012

A bit of fun.....


Hi Susan here....

It is nice to have some time to make cards just for fun....and I really enjoyed making this one....it is for no special reason other than I have not used a Sara Kay image on a card for ages and I love this particular one very much!


The main background paper is from Bo Bunny, wonderful paper, loved using it. It is a 6x6 pad with some of the most amazing papers.
I used two of Tim Holtz stamps for the text paper and the butterflies, and I stamped them using Tim Holtz Distress inks and then aged the edges again with some distress inks.l
The ribbon is from East of India collection of ribbon, this is such a beautiful range of ribbons and accessories, I drool over this collection everytime we go to John Lewis's craft department.
The flower I made up using about four or five layers of flowers from Prima, then put a brad in the centre to hold them together.


I love this little stamp from Sarah Kay, it always reminds me of my daughters when they were little and makes me smile.
I have used chalks to colour the image and distress inks for the edge of the topper.
That beautiful little butterfly that I have fell in love with is from a collection from Craft for Occasions it is laser cut with an embossed design that looks like it is layered on the front.

Thank you for taking the time to look at my work and for all your wonderful comments
Love and hugs
Susan xxx


Monday, 28 May 2012

Lexi's Creations....For the man/boy in your life


Hi Susan here....

Today at Lexi's Creations we are starting a new challenge...how time flies! The theme for the new challenge is
'For the Man/Boy in your Life'
This can be tricky for some, but have a go, Fathers Day is coming up for us here in England and there is always birthdays to make cards for, give it a try it can be fun to work outside of your comfort zone.
The fabulous design team over at LC's have worked wonders and given you lots of inspiration.
Call across to Lexi's Creations for the full details of the challenge and the sponsor.

Now onto my card....

For me, I decided to make a birthday card for my Grandson Liam, who will be 16 in June. How time flies indeed, he is all grown up, leaving school and going to college this year. It has been an exciting year for him in many ways, he is just coming to the end of all his exams, and done really well, and the best thing as far as he is concerned his football team 'Manchester City' became the Champions for which there was no end to the celebrations. 
We bought a couple of new tops from the City Store and they were placed into a really nice black bag with a silver emblem on both sides...I promptly cut the emblems out when we got home and put them on one side so that they didn't get any harm to them.
I have used one of them on his birthday card.
My backing paper is from my stash, it comes from an old scrapbooking pad full of male orientated papers. Just right for what I wanted. I added the birthday sentiment in the shape of a star and matted it onto a piece of mirri card.


This image is available from Fairy Dust Crafts designed by Lexi Lee our designer for LC's. It is called Footie Ali, I have coloured it with chalks.

Thank you for taking the time to look at my card and for all your fabulous comments.
Love and hugs
Susan xxx


Monday, 14 May 2012

Lexi's Creations....Black and White plus 1 more colour


Hi Susan here....


We have started a new challenge over at Lexi's Creations today and the theme is
'Black and White plus 1 more colour'
Please try this challenge, it's lots of fun to do....the effects can be quite spectacular, if you are unsure what to do check out the inspiration from the design team over at Lexi's Creations Challenge Blog. You will get all the information you need about the challenge and our sponsor.


Now onto my card....


I have chosen PINK as my other colour to add to the black and white, at the moment I am so into butterflies, I couldn't resist using the DIY butterfly from Fairy Dust Crafts. I used promarkers to colour and shade then I added stickles all over the wings before attaching pearls for the bodies. The pearls as always come from our local market.
My backing papers are from a 6x6 paper pad from Kaiser Craft called 'Black and white timeless collection'. I used black card to back the stripes to help them to stand out. They are such beautiful papers and all have the look of being distressed both with the printing and the edges. The main backing card is from Paper Mill Direct.


The ticket and sentiment are from Fairy Dust Crafts, I blanked out the centre of the ticket and then fitted the sentiment 'The Gift' to it. I coloured around the edge with promarkers and then added stickles.

Thank you for taking the time to look and for your wonderful comments
Love and hugs
Susan xxx